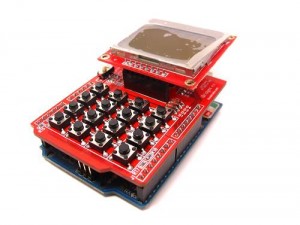
Neu im Sortiment – Ein Matrix Keyboard Shield mit Nokia Display Interface.
Ich habe die Arduino Keypad Library etwas angepasst damit sie mit diesem Shield arbeitet
(Keypad Library geht davon aus dass die Row Pins mit Pullup Widerstanden versehen sind – bei diesem Shield sind es aber Pulldown Widerstände)
Das Keypad eine 4×4 Matrix benützt folgende Arduin Pins:
Reihe 1-4: A5,A4,2,3
(um die Analog Pins als Digital Pins zu nutzen müssen sie entweder mit A0,A1 oder 19,18 angesprochen werden)
Spalte 1-4: 4,5,6,7
Hier meine angepasste Keypad Library : keypad.tar.gz
damit läuft z.B. dieser Beispielcode:
/* @file CustomKeypad.pde

|| @version 1.0

|| @author Alexander Brevig

|| @contact alexanderbrevig@gmail.com

||

|| @description

|| | Demonstrates changing the keypad size and key values.

|| #

*/

#include
const byte ROWS = 4; //four rows
const byte COLS = 4; //four columns
//define the cymbols on the buttons of the keypads
char hexaKeys[ROWS][COLS] = {
{‚0′,’1′,’2′,’3‘},
{‚4′,’5′,’6′,’7‘},
{‚8′,’9′,’A‘,’B‘},
{‚C‘,’D‘,’E‘,’F‘}
};
byte rowPins[ROWS] = {19, 18, 2, 3}; //connect to the row pinouts of the keypad
byte colPins[COLS] = {4, 5, 6, 7}; //connect to the column pinouts of the keypad
//initialize an instance of class NewKeypad
Keypad cusomKeypad = Keypad( makeKeymap(hexaKeys), rowPins, colPins, ROWS, COLS);
void setup(){
Serial.begin(9600);
}
void loop(){
char customKey = cusomKeypad.getKey();
if (customKey != NO_KEY){
Serial.println(customKey);
}
}
…mal sehen ob man da nicht einen Arduino Taschenrechner bauen kann ;-)
